
Configure EAP-TLS using ISE and Meraki AP
- #wireless
- #security
This post describes how to set up a Meraki WLAN with 802.1x using EAP-TLS as an Authentication Method.
If you want to get some background about the flow process of EAP-TLS, please take a look at my previous post, along with RFC 5216 page.
Components Used
- Windows 10 Workstation (Wireless Supplicant)
- Meraki MR52 (Authenticator)
- Cisco ISE (Authentication Server)
- Windows Server 2016 (Certificate Authority)
- Some L2/L3 Network devices help with end-to-end communication.
Topology Implemented
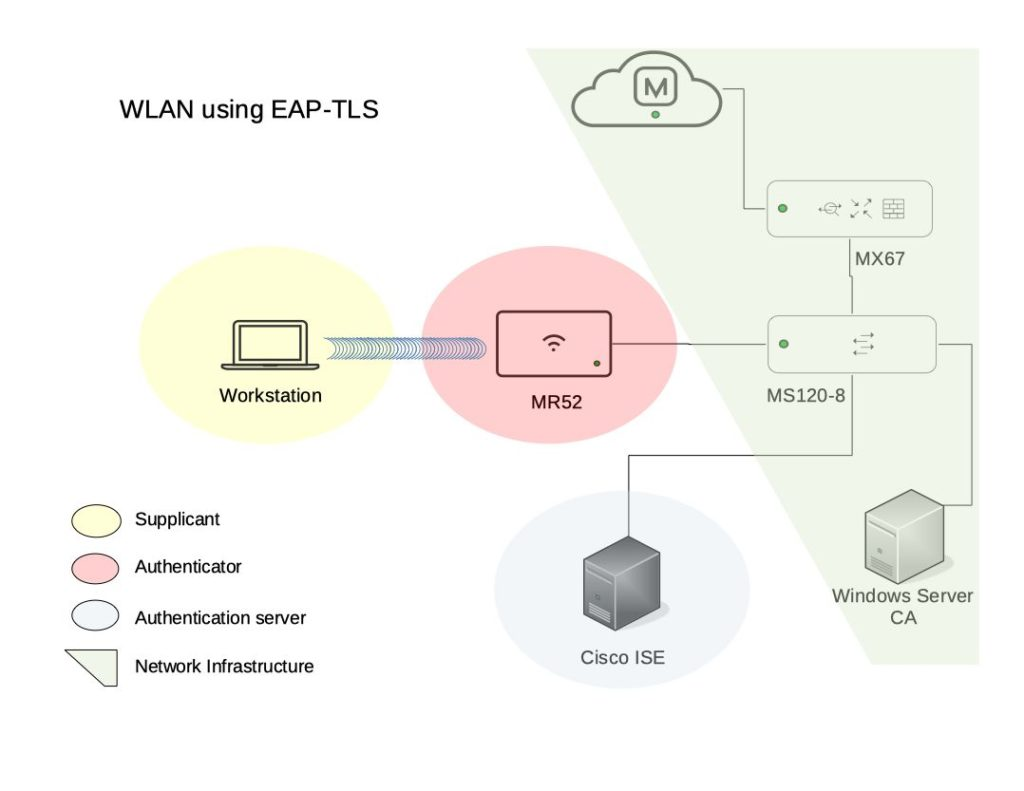
You can use other alternatives or combinations of the components above mentioned, but for this demo, I will play around with the above topology, we expected to have complete reachability between the Authenticator, Authentication Server, and Certificate Authority Server to get the wireless authentication using EAP-TLS.
Configure
I will mainly focus on the Authenticator, and the Authentication Server side, however, I’m going to scope some supplicant and CA configurations as well.
Let’s start with the Authenticator = Meraki Side
- The first step is to configure an SSID in the Meraki Dashboard, in the desired Meraki Network go to:
as shown in the image.
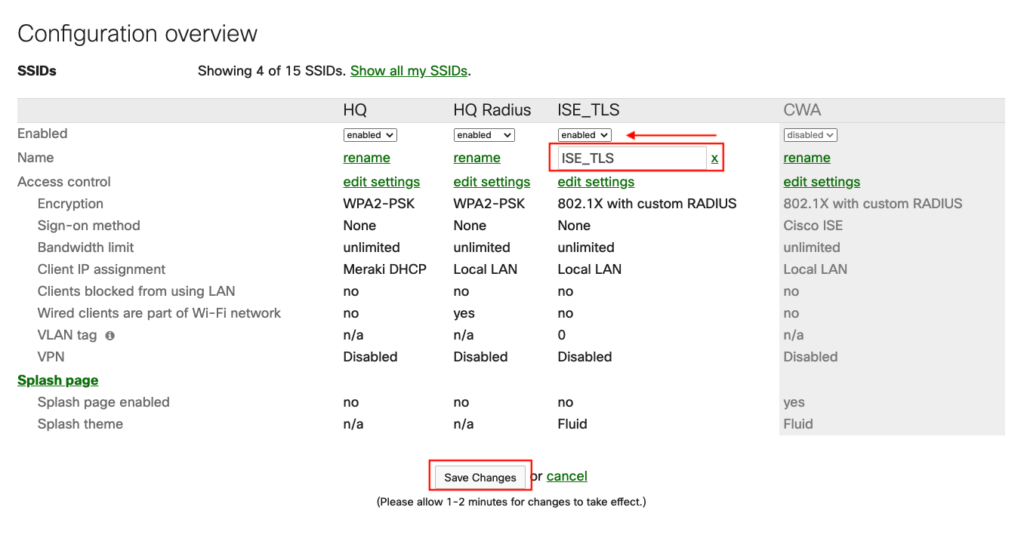
After saving, click on edit settings.
- Under Access Control (select the SSID)
- Association requirements: Enterprise with my RADIUS server as shown in the image.
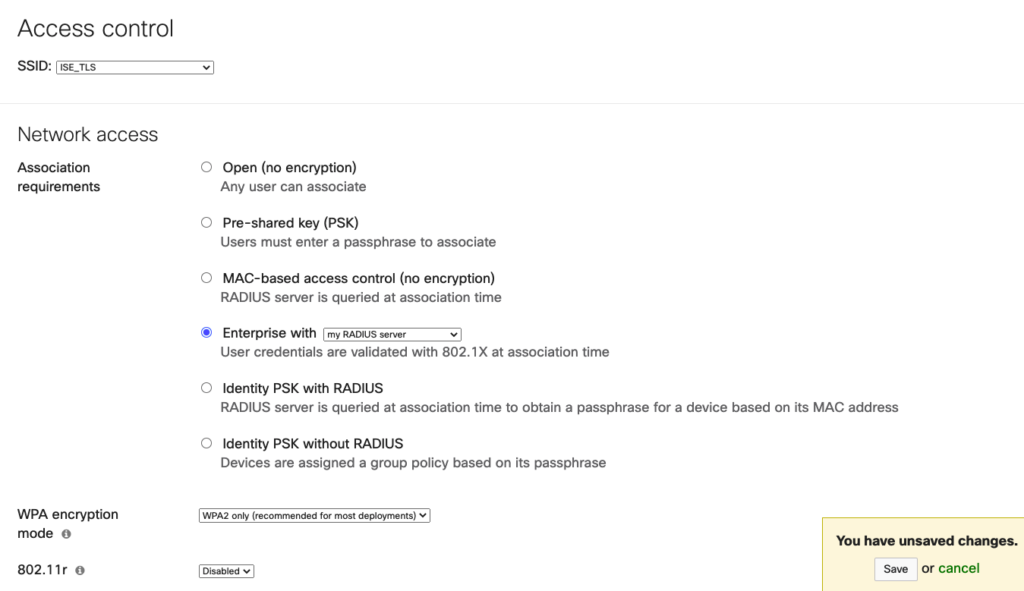
- Splash page None (direct access)
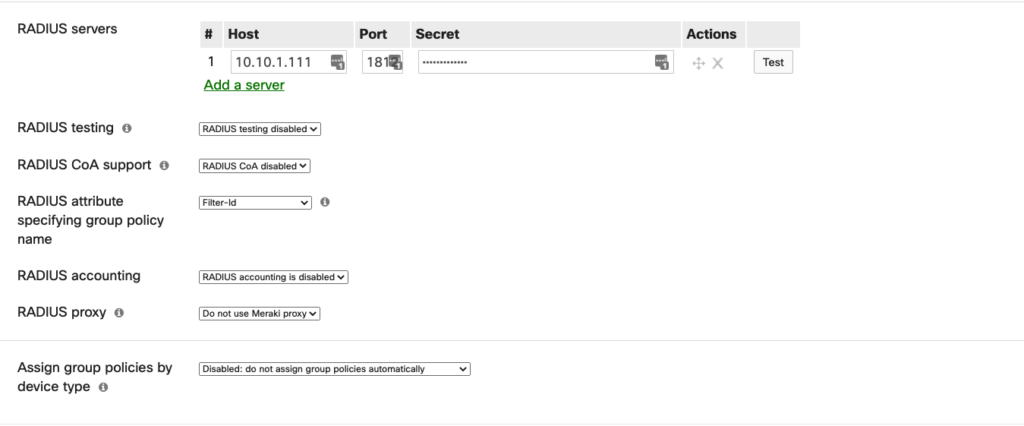
- RADIUS servers (Here, you need to enter the IP address and the shared secret that is used to validate the MR52 on the ISE side.
- Optionally, you can enable RADIUS CoA, and you can set the RADIUS Accounting (I’m just leaving the default values) as shown in the image.
- The client IP assignment (It’s up to you, you can use Bridge mode with or without VLAN tagging, or simply use NAT mode for simplicity as shown in the image.
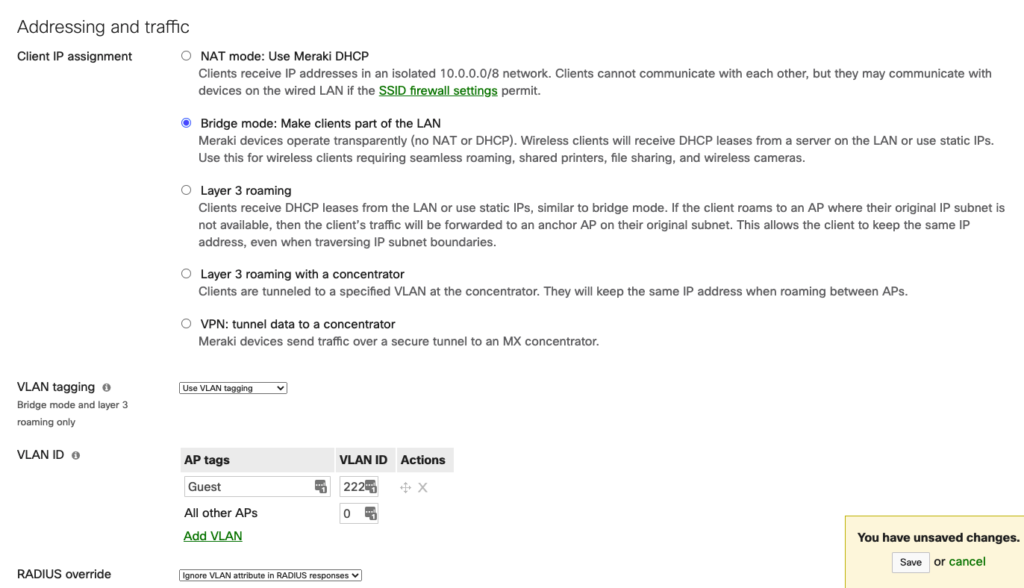
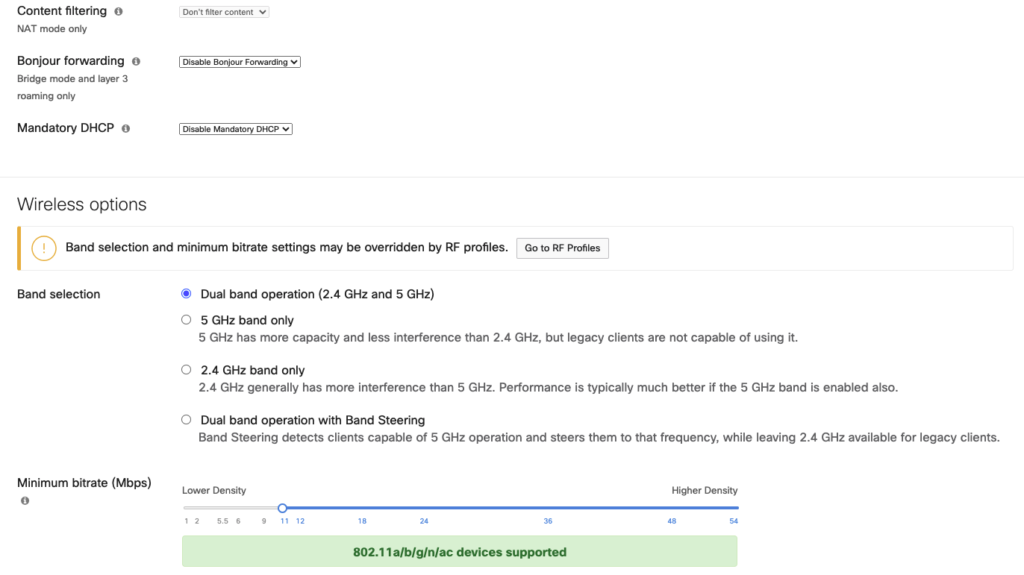
- I’m leaving the rest of the options per Meraki default as shown in the image.
- It is a good idea to verify that you can reach the RADIUS server from the MR52 before you continue, go to
Now, the Authenticator side is done!
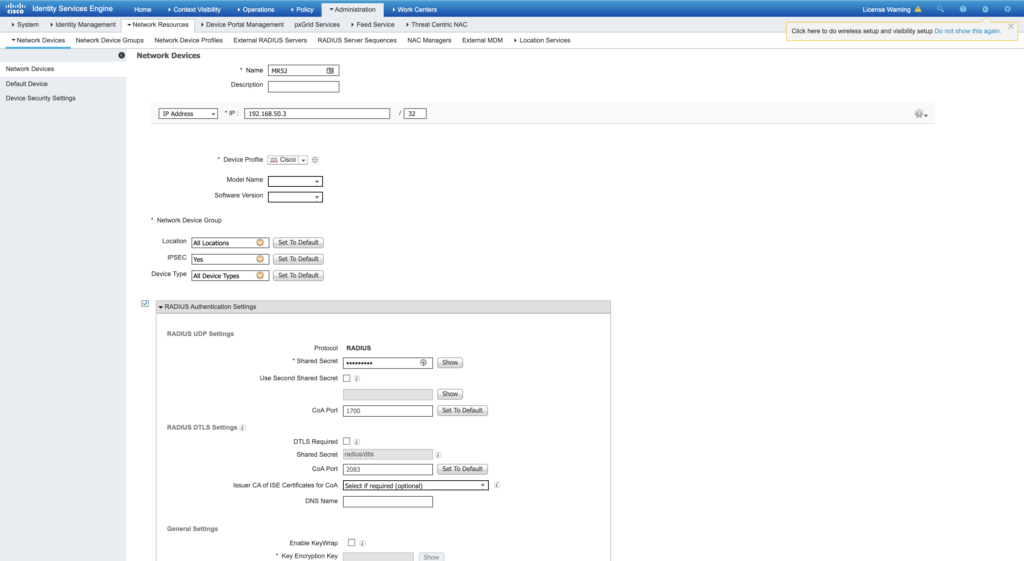
RADIUS server (ISE configuration)
- Go to:
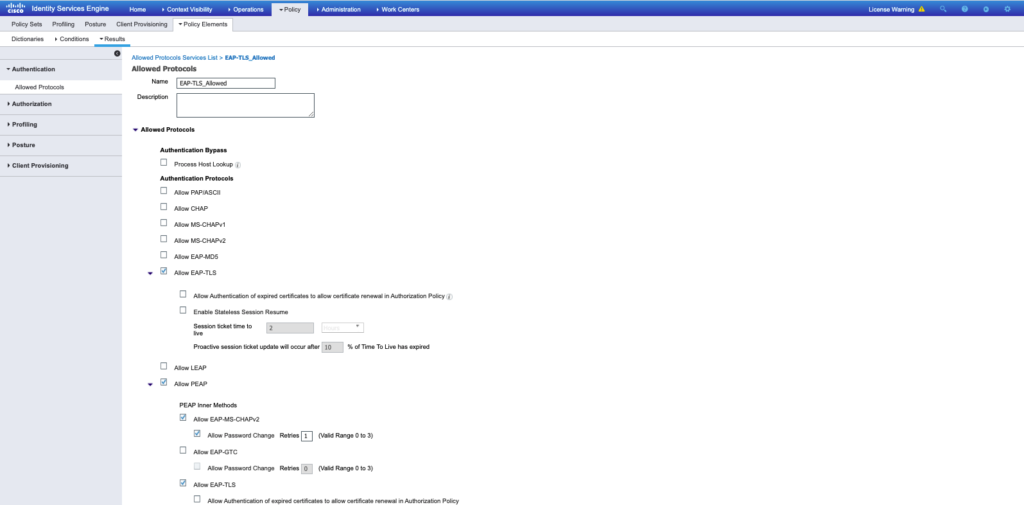
And click Add.
- On this Allowed Protocol list, you can enter the name for the list. In this case, Allow EAP-TLS box is checked and other boxes are unchecked as shown in the image.
- Go to:
as shown in the image.
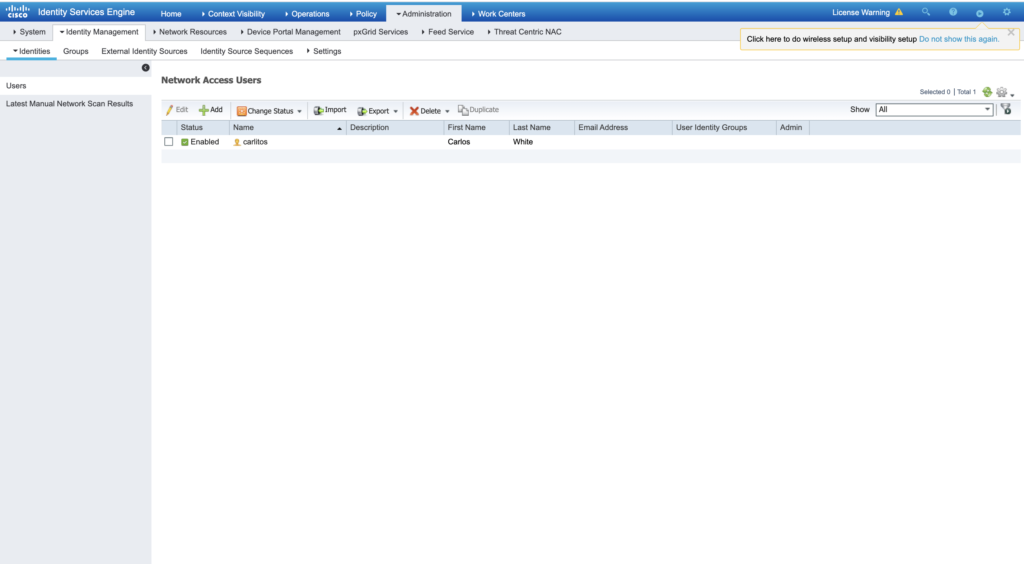
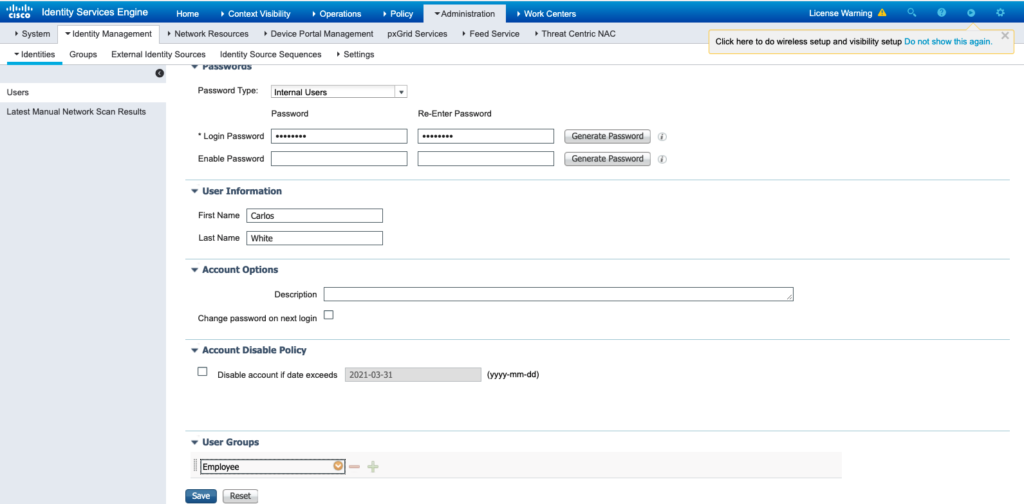
- Create New User on ISE. Go to:
as shown in the image.
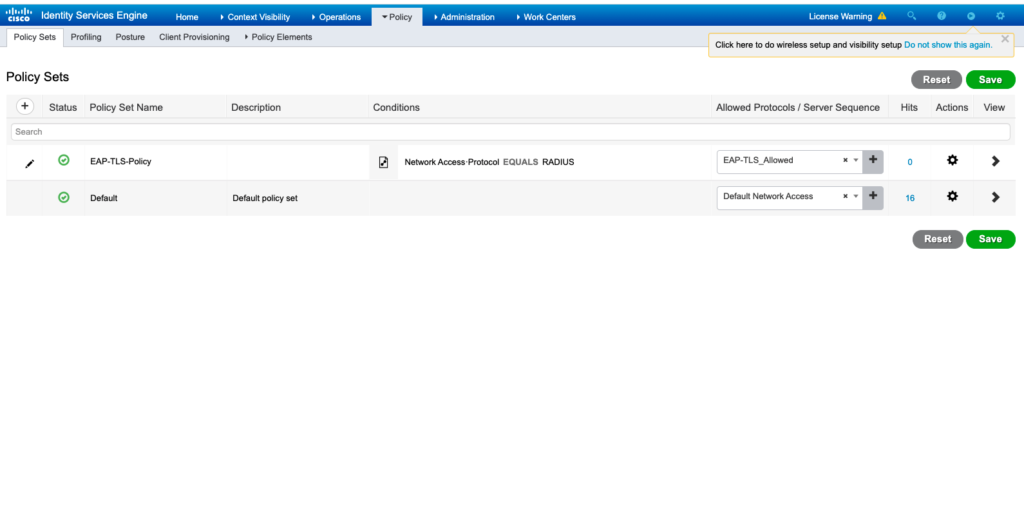
- Create Policy set. Go to:
and then click on the plus (+) icon in the upper-left corner as shown in the image.
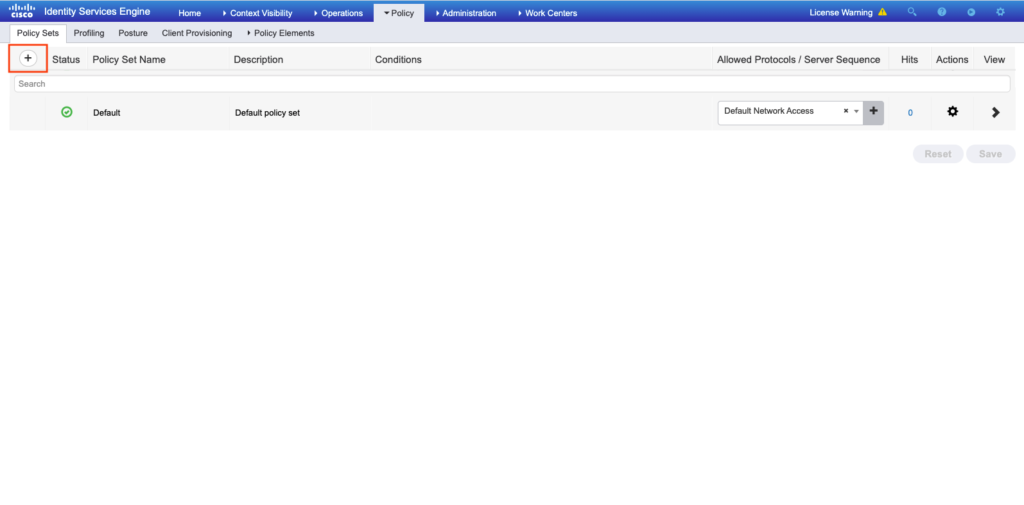
- Set the policy name (it could be something generic)
Under the conditions menu, select “Network Access Protocol > EQUALS RADIUS”, and lastly, select the name of the policy result set in step 1 as shown in the image.
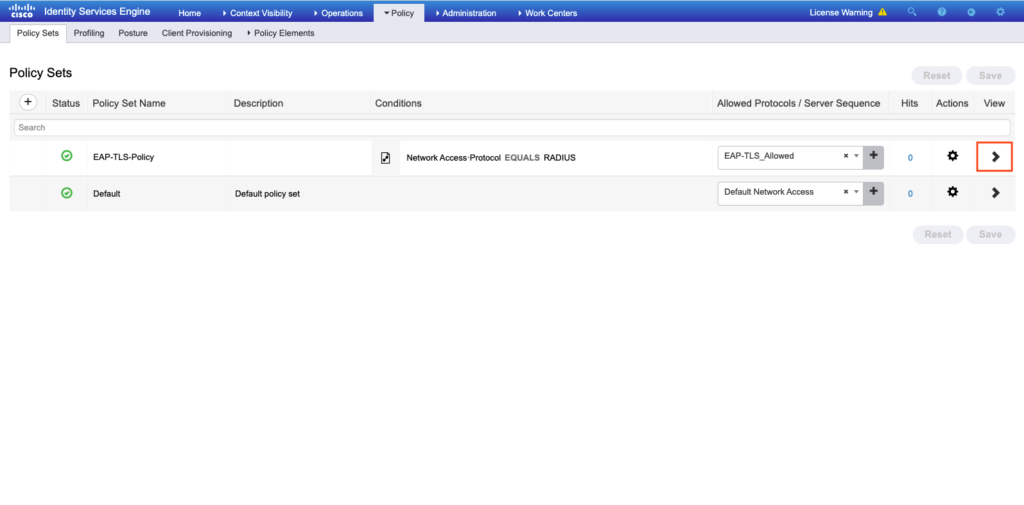
- Create an Authentication Policy.
Go to the > icon on the body’s right side as shown in the image.
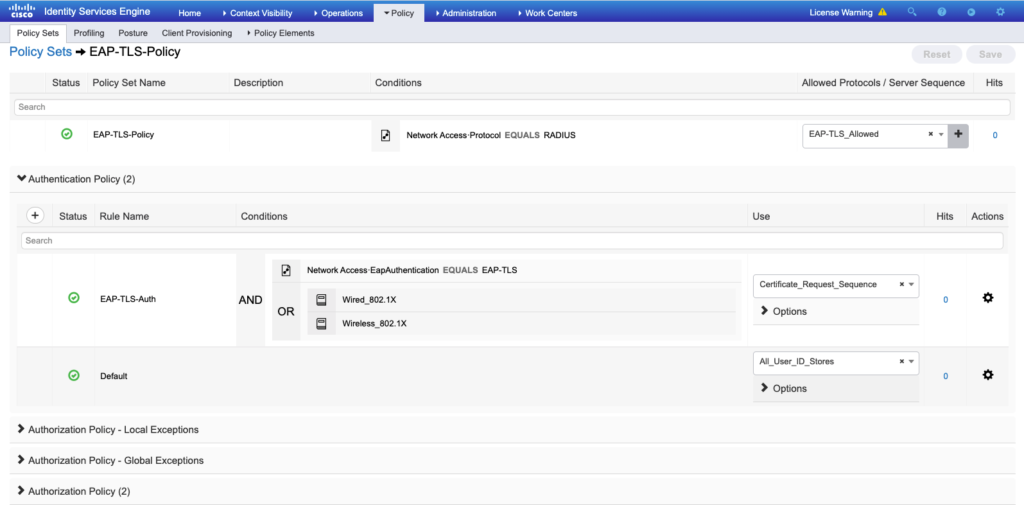
- Go to Authentication Policy > click on the plus (
+) icon, and set “the conditions & use” as shown in the image.
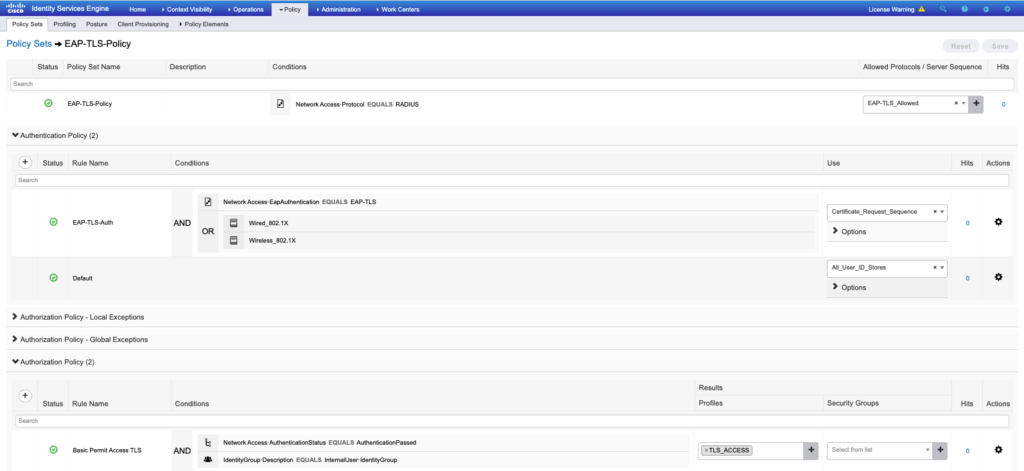
- Go to Authorization Policy > click on the plus (
+) icon, and set “the conditions & results profiles” as shown in the image.

- Verify
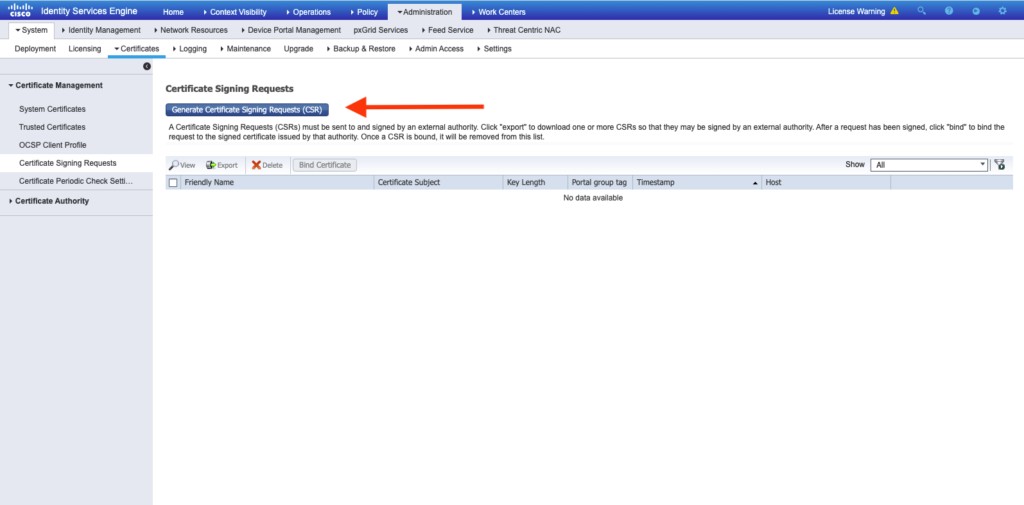
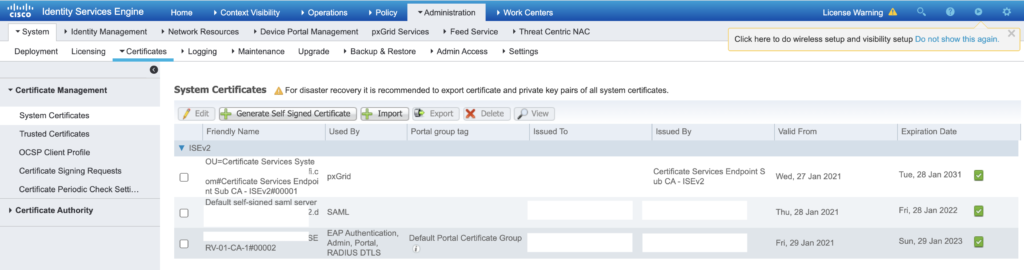
- Certificate on ISE. Go to:
as shown in the image:
As shown in the image.
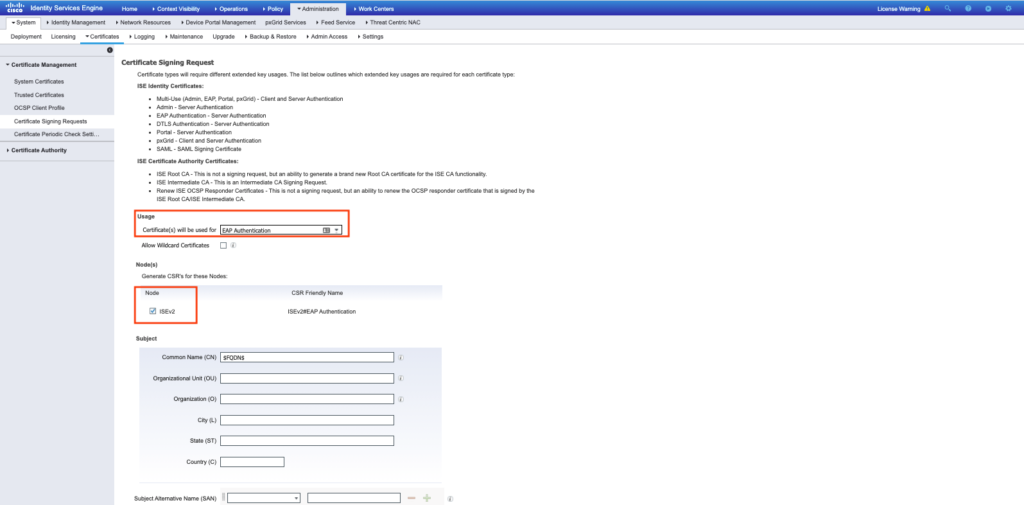
The result:
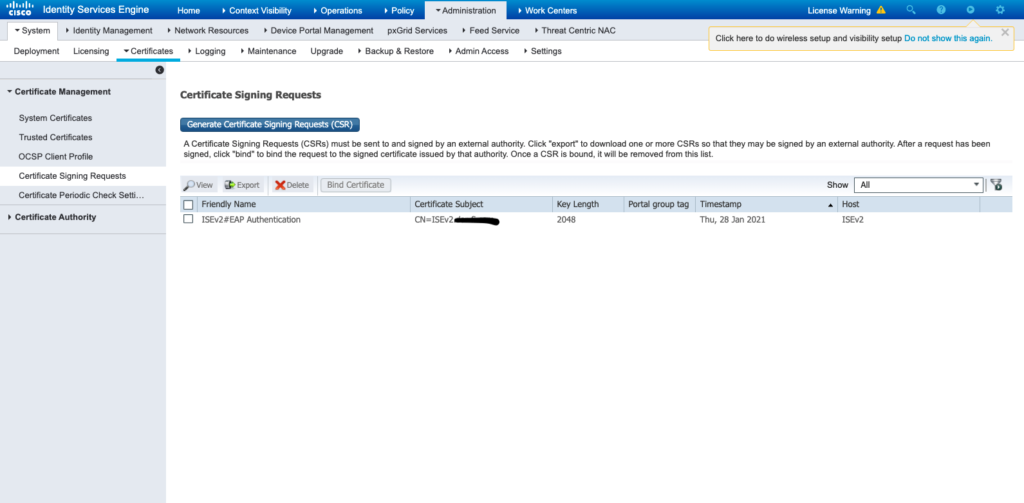
As shown in the image.
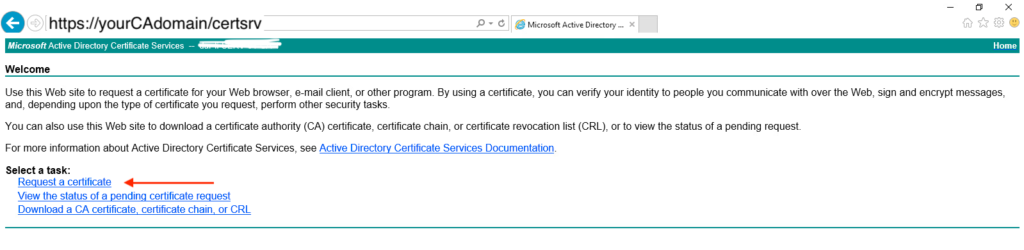
- From here is necessary to go into the Windows Server (Certificate Authority) > open a web browser and Request a Certificate to complete the ISE configurations as shown in the image.
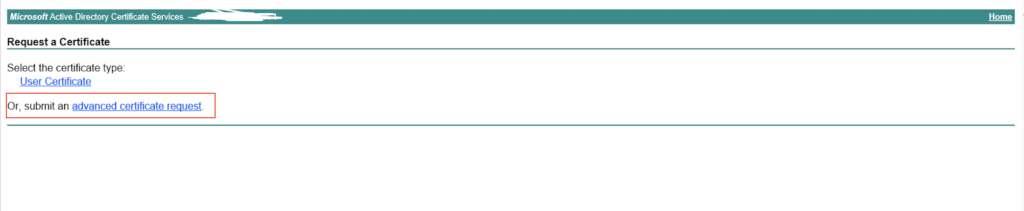
- Click Advanced certificate request as shown in the image.
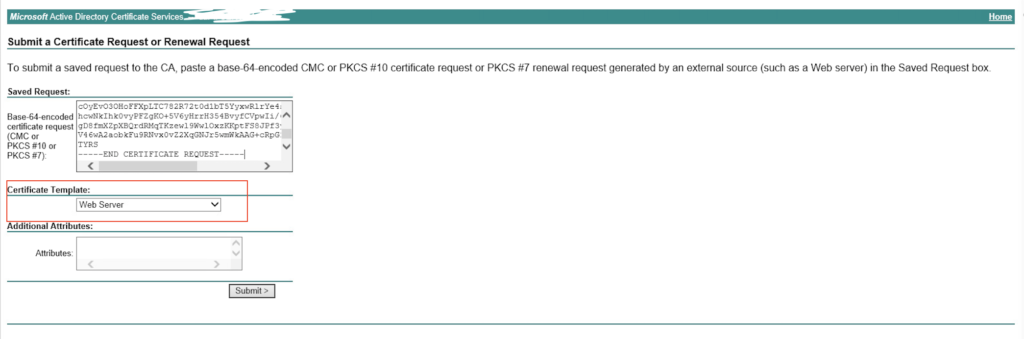
- Click Submit a certificate request by using a base-64…. as shown in the image.

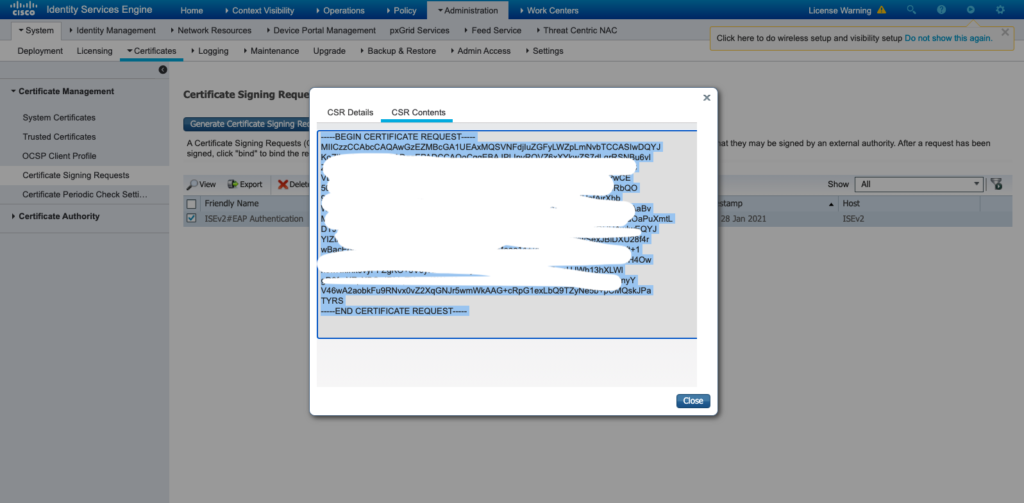
- Paste the CSR generated on step 12 in the Base-64 encoded certificate request. From the Certificate Template: drop-down option, choose Web Server and click Submit as shown in the image.
- Once you click Submit, you get the option to select the type of certificate, select Base-64 encoded, and click Download certificate chain as shown in the image.

- Going back to the ISE server
Extract the certificates, the main file will contain two certificates, one root certificate, and another intermediate. The root certificate can be imported under
As shown in the images.
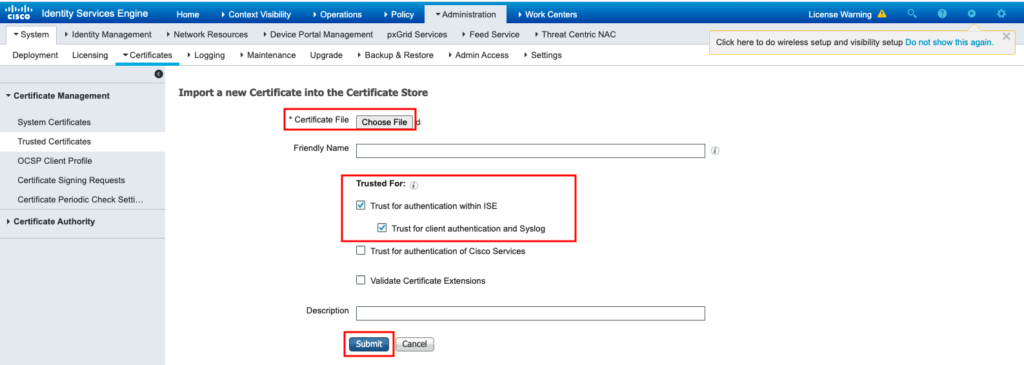
Once you click Submit, the certificate is added to the trusted certificate list.
- Go to
and add the intermediate certificate as shown in the image.
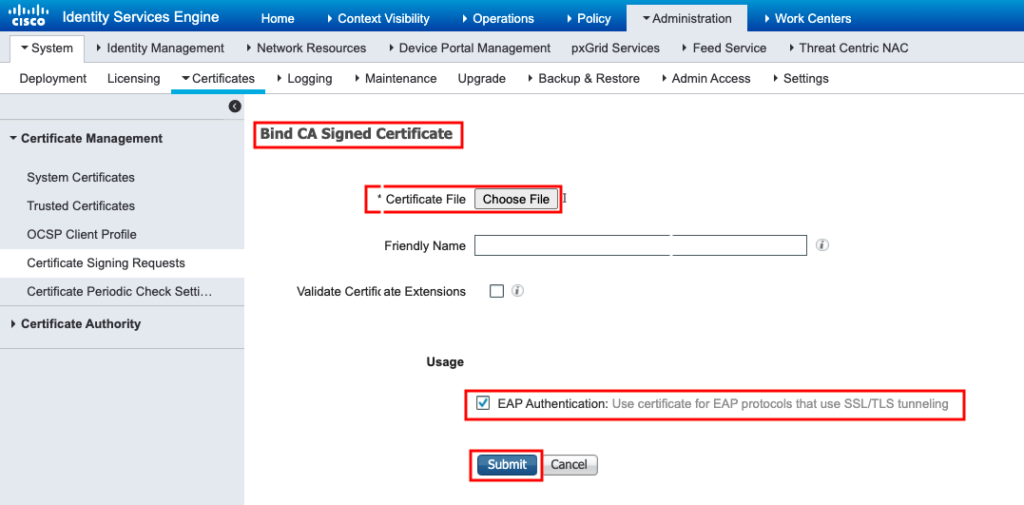
- To view the certificate, navigate to
Windows Workstation (Supplicant)
To authenticate a wireless user through EAP-TLS, you have to generate a client certificate.
- Go to the CA and create a user using the same credentials used in the RADIUS server (ISE configuration) step 3.
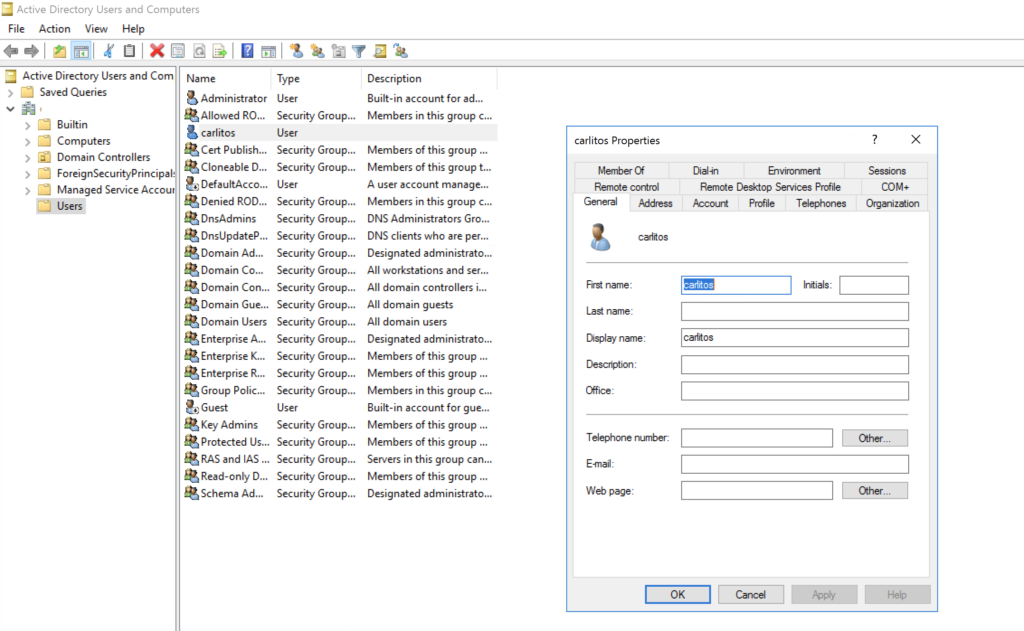
For this lab, I’m creating a matching user on both sides (ISE & CA) you can integrate an AD or LDAP to your ISE server and reference it under the policy set authentication as well.
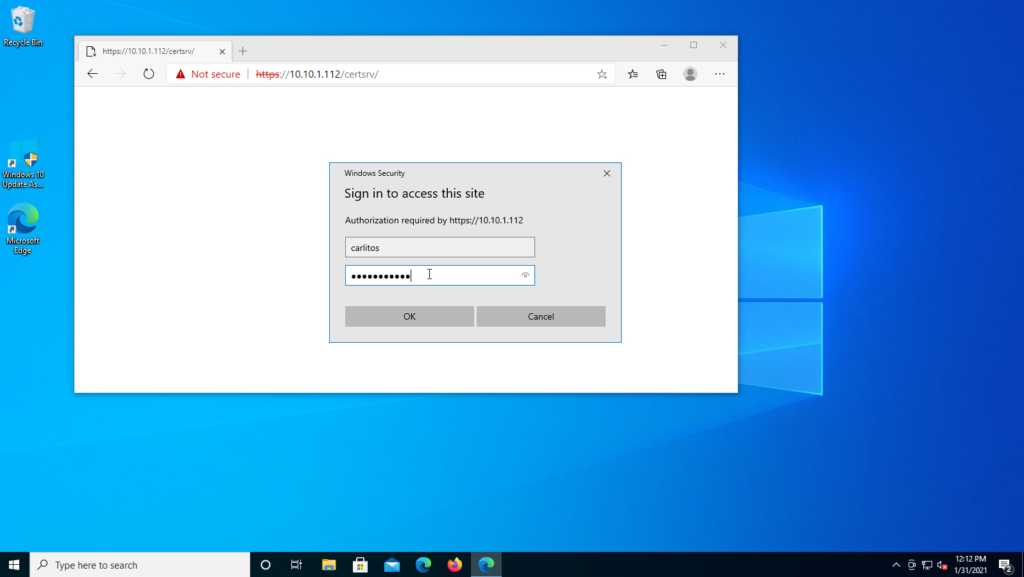
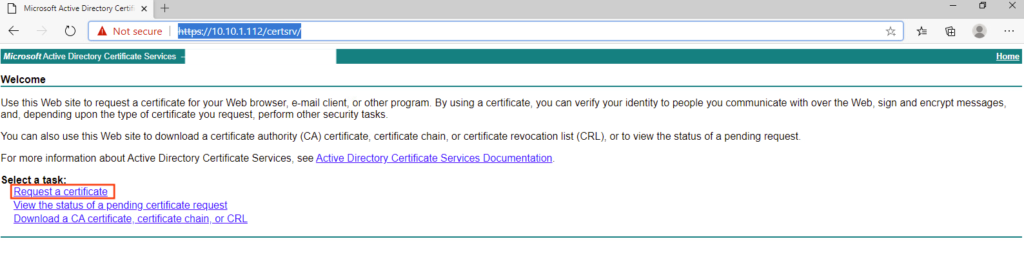
- Connect your Windows computer to the network so that you can access the server. Open a web browser and enter this:
https://severIPaddress/certsrv
The credential belongs to the recent user created on the CA & ISE.
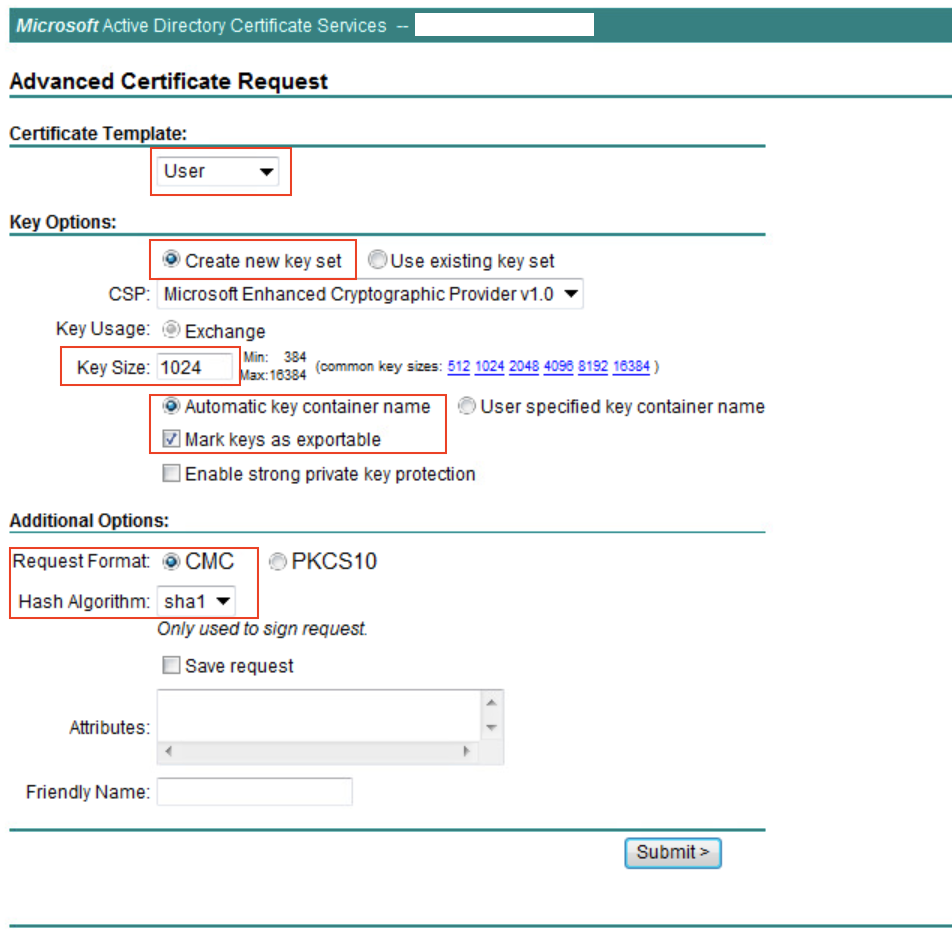
- Click Request a certificate as previously done, however this time you need to select User as the Certificate Template as shown in the image.
- Click User Certificate as shown in the image.

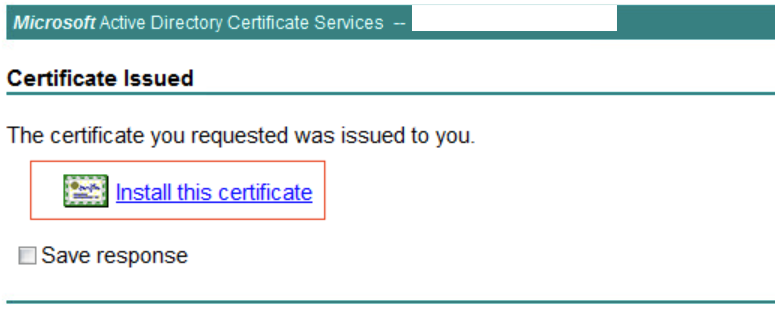
- Go to:
as shown in the image.
- Click Install this certificate to install the certificate in the local machine.
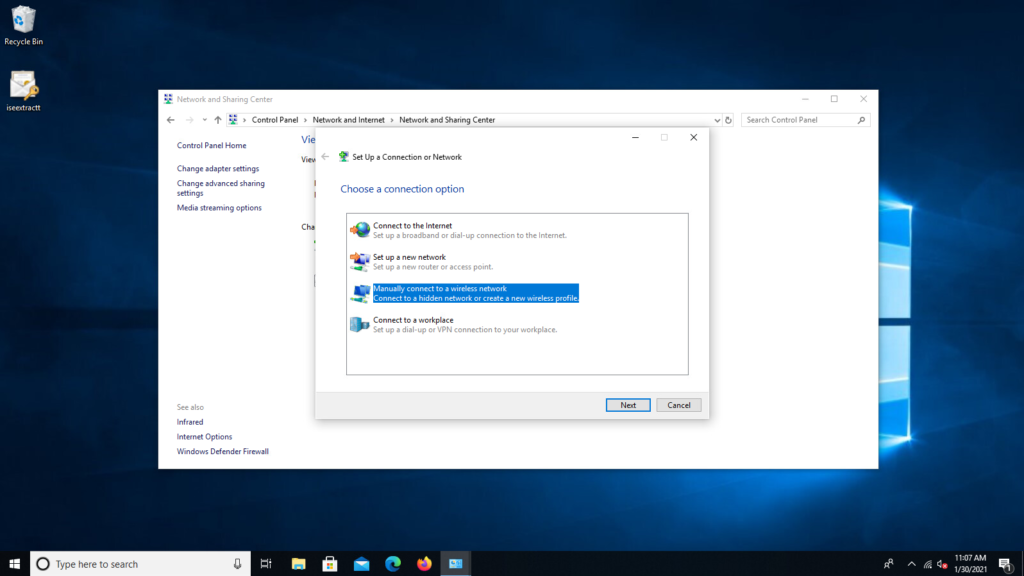
- Go to:
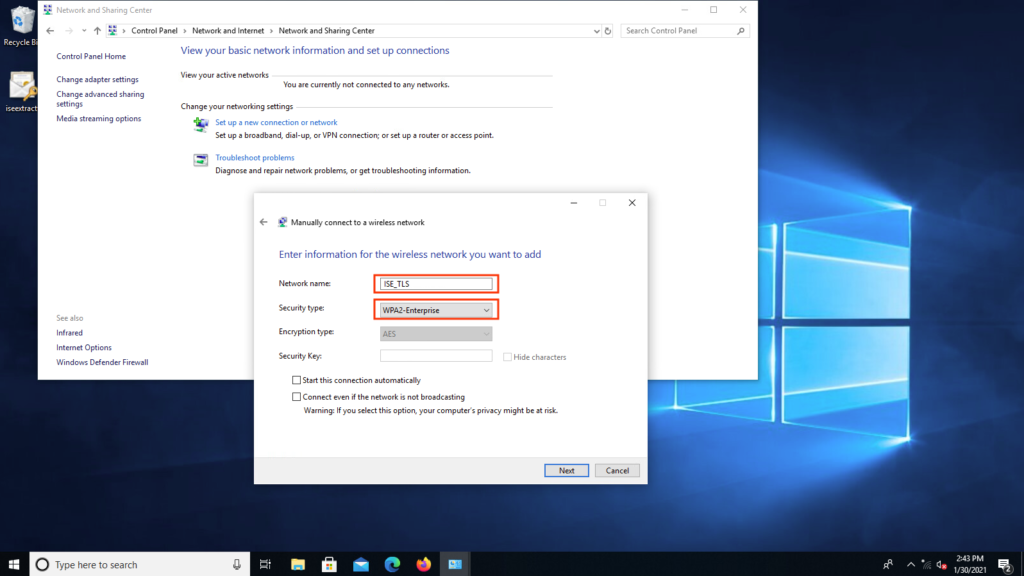
Select Manually connect to a wireless network > Next** as shown in the image.
- Network name (This name must match with the SSID in The Authenticator = Meraki Side Step 1) > Security type: Select WPA2-Enterprise > Next.
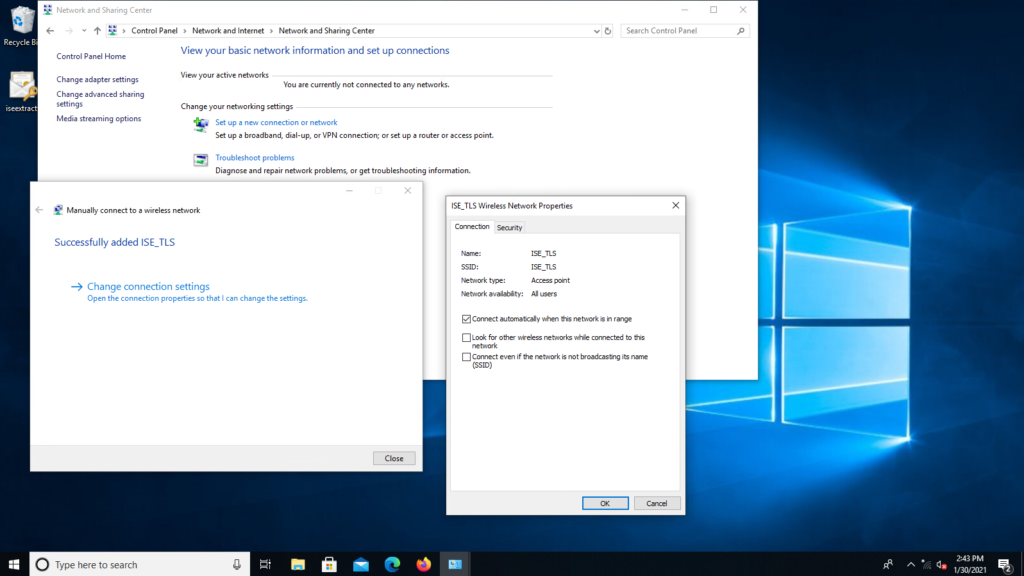
- Click Change connection settings.
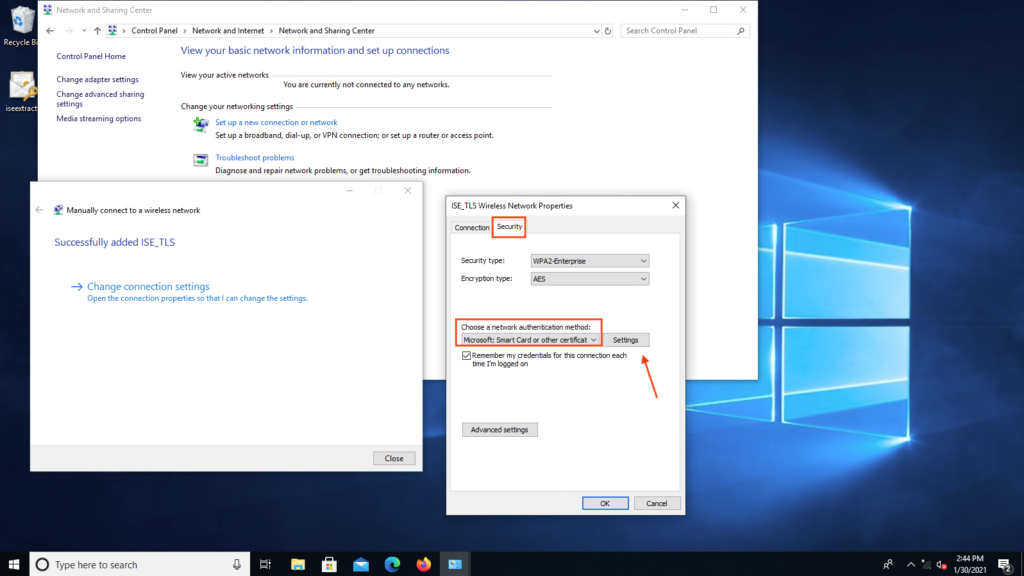
- Select Microsoft: Smart Card or other certificate and click Settings.
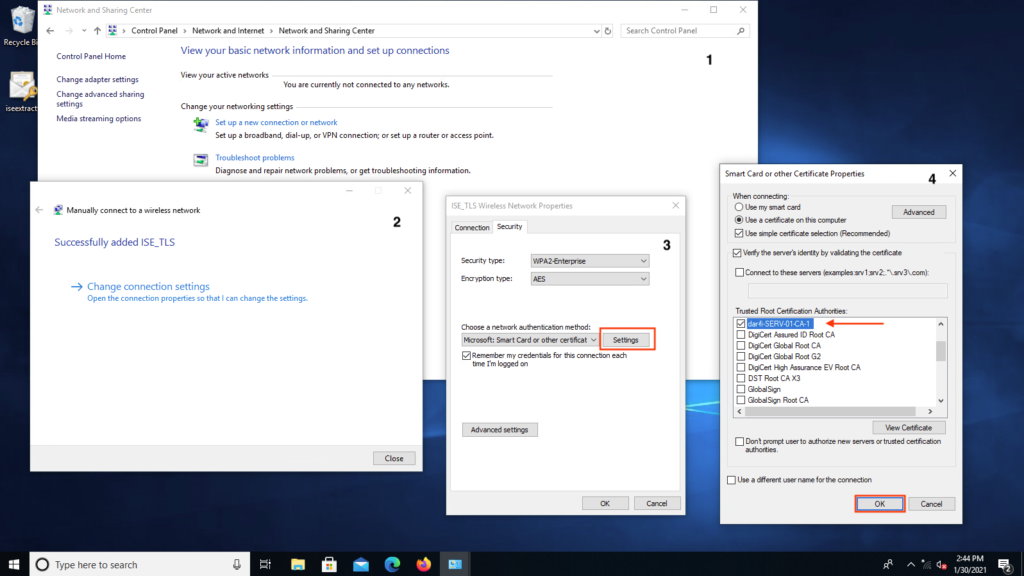
- Select Trusted Root Certification Authorities (this is the certificate issued from the CA server) > Click OK as shown in the image
- Click Advanced Settings and select User or computer authentication from the 802.1x settings tab > Click OK as shown in the image.

- Go to Wireless network, select the correct profile (ISE_TLS in this example) and Connect as shown in the image.

Verify
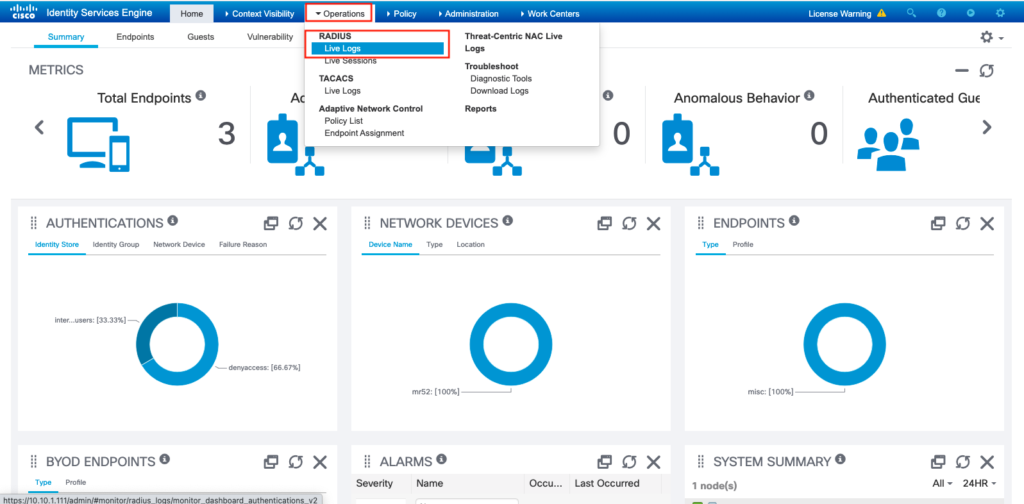
After the successful authentication to the WLAN, go to the ISE server dashboard > Operations > RADIUS > Live Logs as shown in the image.
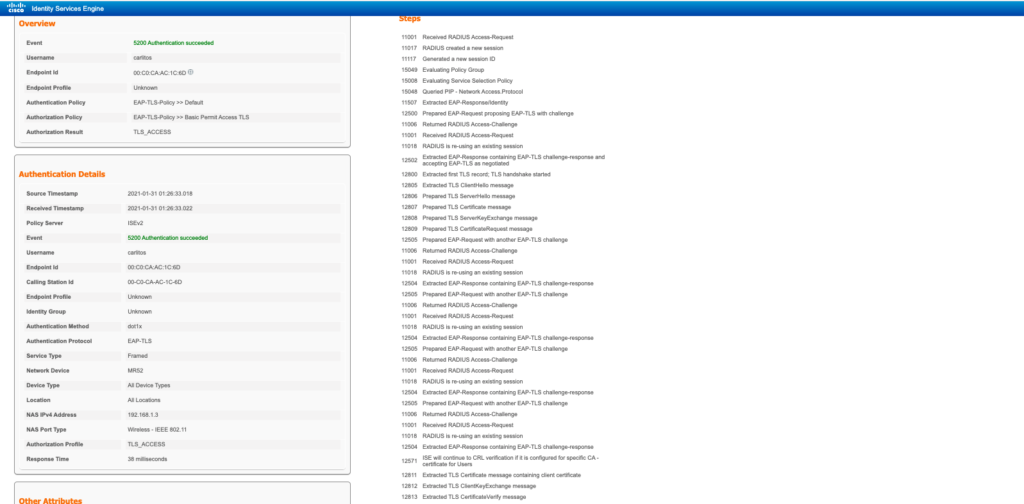
An example of what a successful EAP-TLS log looks like:
I will post some troubleshooting steps in a different post!
Thanks for reading!